Join the AI Workshop and learn to build real-world apps with AI. A hands-on, practical program to level up your skills.
- Introduction
- Should I switch to VS Code? And why?
- Getting started
- Explorer
- Search
- Source Control
- Debugger
- Extensions
- The Terminal
- The Command Palette
- Themes
- Customization
- Nice configuration options
- The best font for coding
- Workspaces
- Editing
- Code snippets
- Extensions showcase
- The VS Code CLI command
- Solving high usage CPU issues
Introduction
VS Code is an open-source coding editor from Microsoft, and it’s one of my favorite tools in my web development workflow.
It’s fast, and it has won the enthusiasm of the community: there are thousands of extensions, some official, and some made by the community.
Microsoft releases an update every month. Frequent updates foster innovation and Microsoft is listening to its users, while keeping the platform as stable as possible.
Getting started
The home page of VS Code is https://code.visualstudio.com/.
Go to that site to download the latest stable release of the editor.
The installation process depends on the platform, and you should be used to it.
When you start the editor for the first time, you will see the welcome screen:
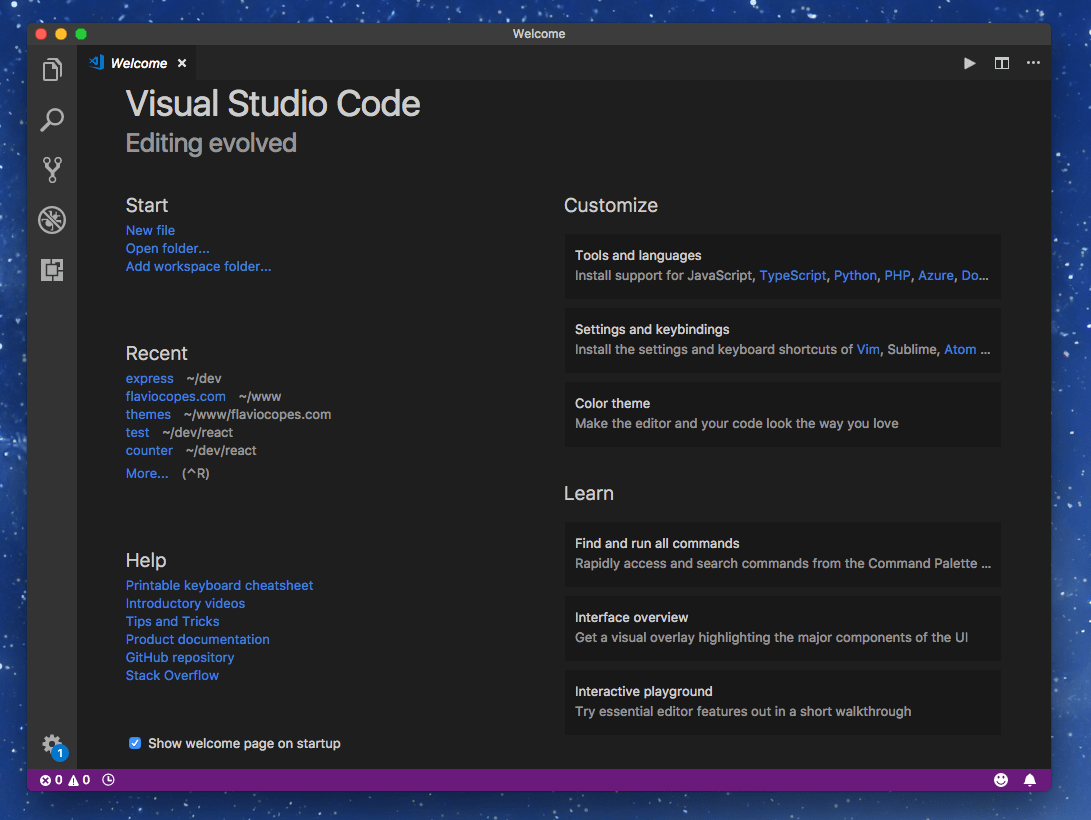
There is a toolbar on the left with five icons. That gives access to:
- The File Explorer
- Search
- Source Control
- The Debugger
- The Extensions
Explorer
Let’s start the exploration with the Explorer (pun intended).
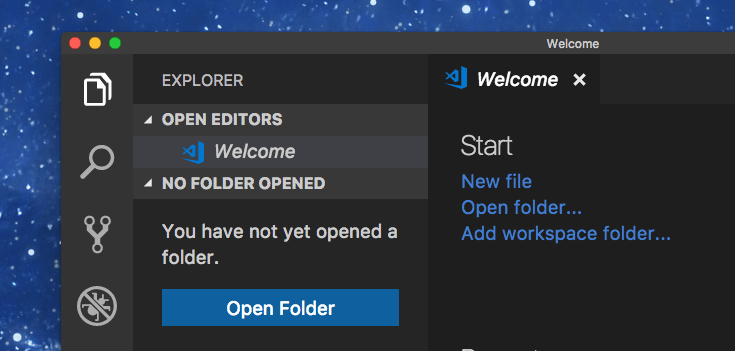
Press the “Open Folder” button in the sidebar, or the Open folder... link in the Welcome page. Both will trigger the file picker view.
Choose one folder where you have source code, or even just text files, and open it.
VS Code will show that folder’s contents in your view:
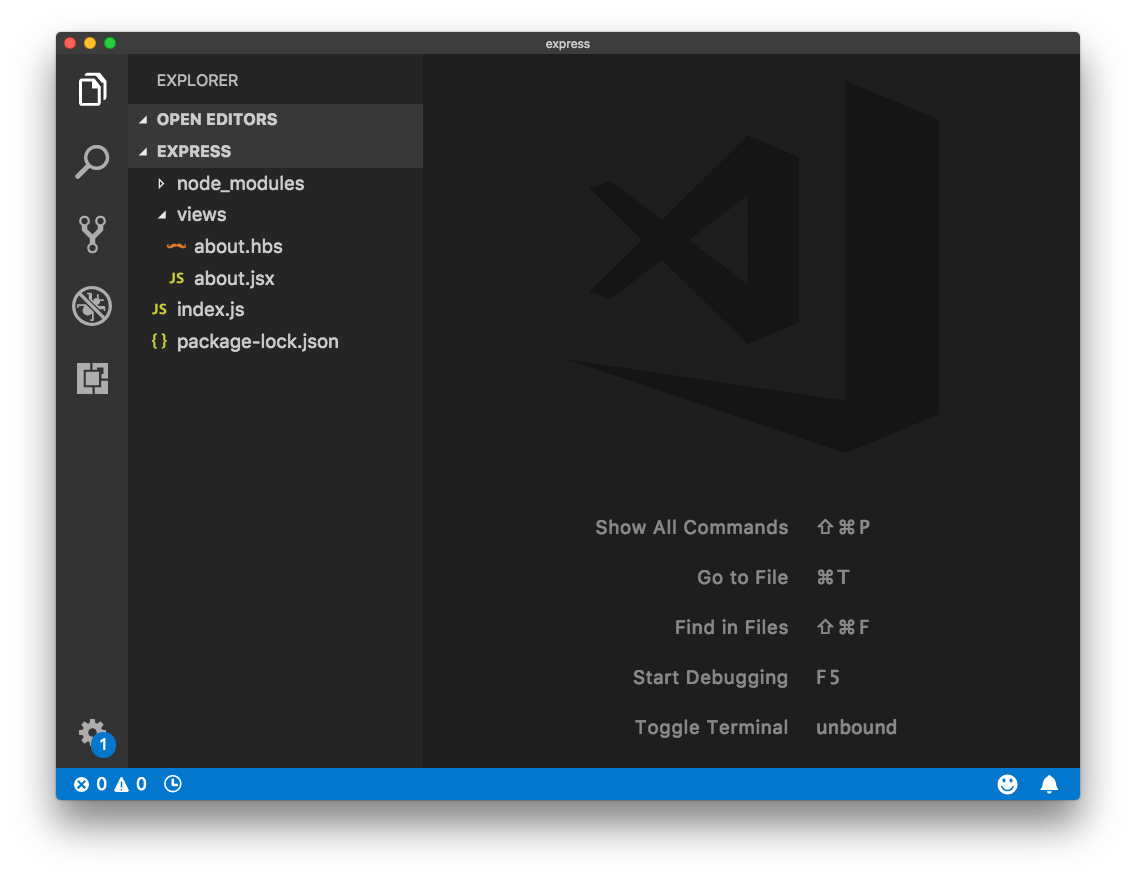
On the right, the empty view shows some commands to perform quick operations, and their keyboard shortcuts.
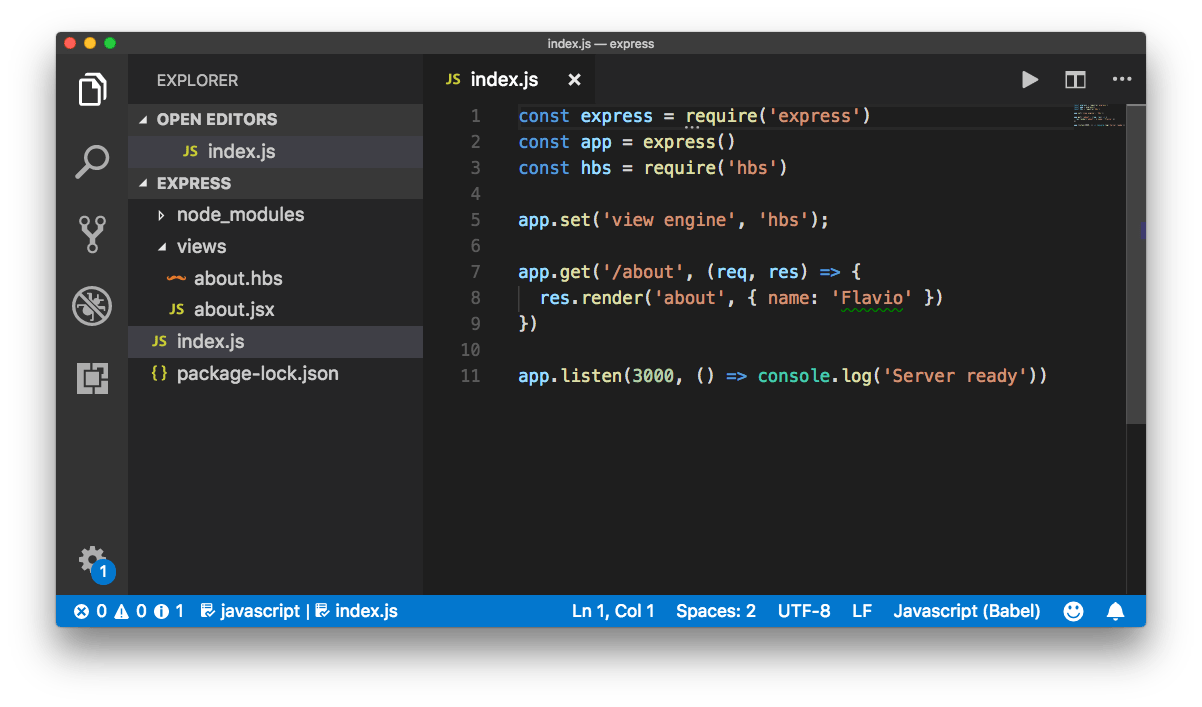
If you select a file on the left, that file will open on the main panel:
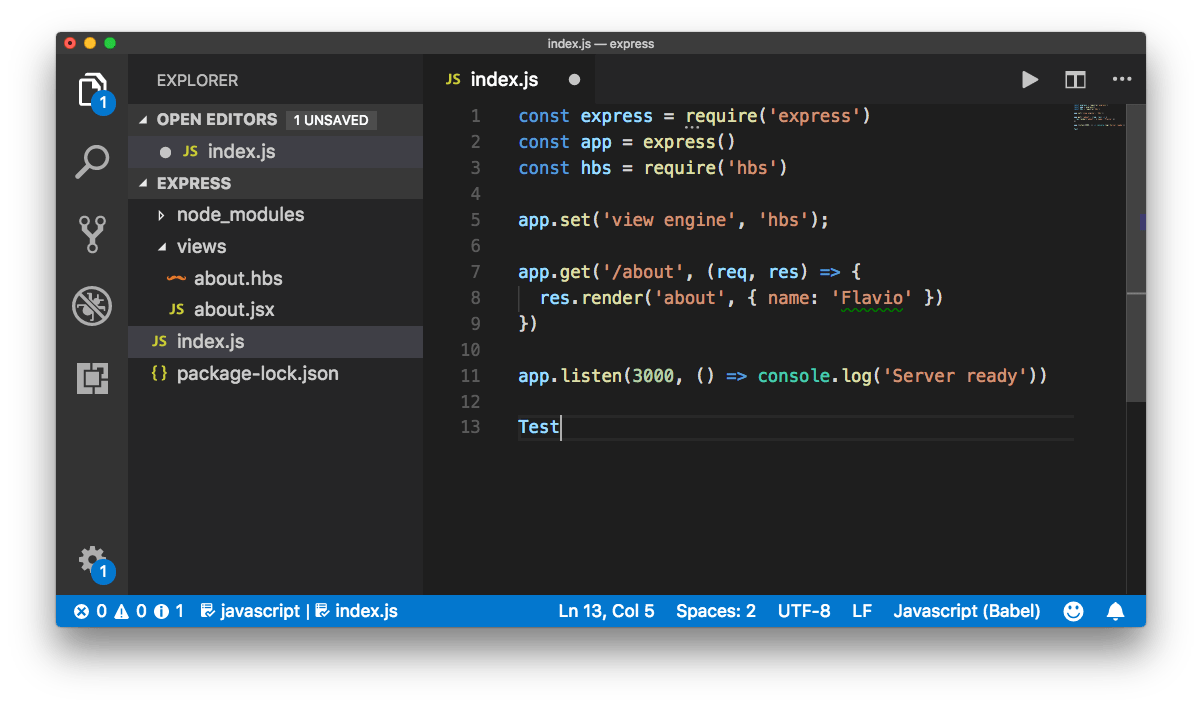
and if you start editing it, you’ll notice a dot will appear next to the file name in the tab, and in the sidebar as well:
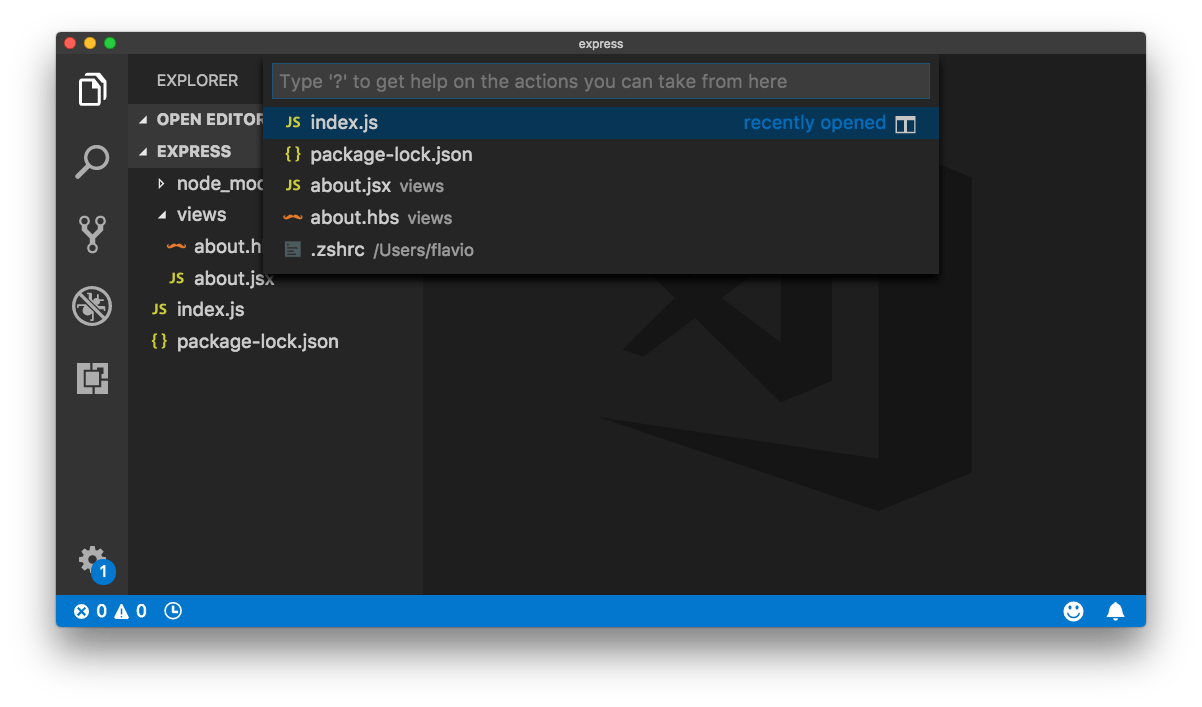
Pressing Cmd+P will show you a quick file picker to easily move through files in large projects:
You can hide the sidebar that hosts the file tree using the shortcut Cmd+B.
Note: I’m using the Mac keyboard shortcuts. Most of the time, on Windows and Linux you just change CMD to CTRL and it works, but not always. Print your keyboard shortcuts reference.
Search
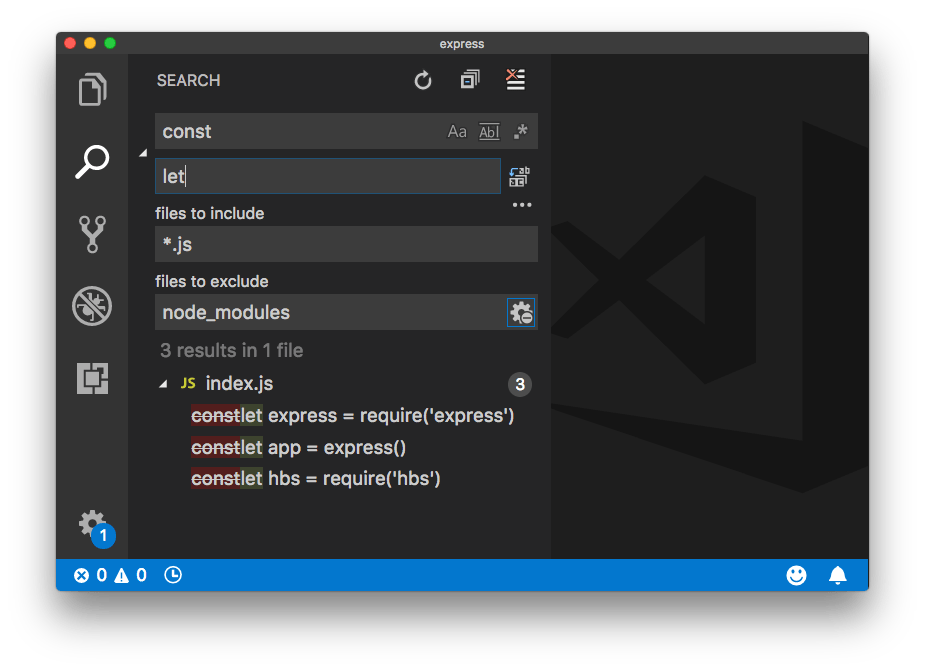
The second icon in the toolbar is “Search”. Clicking it shows the search interface:
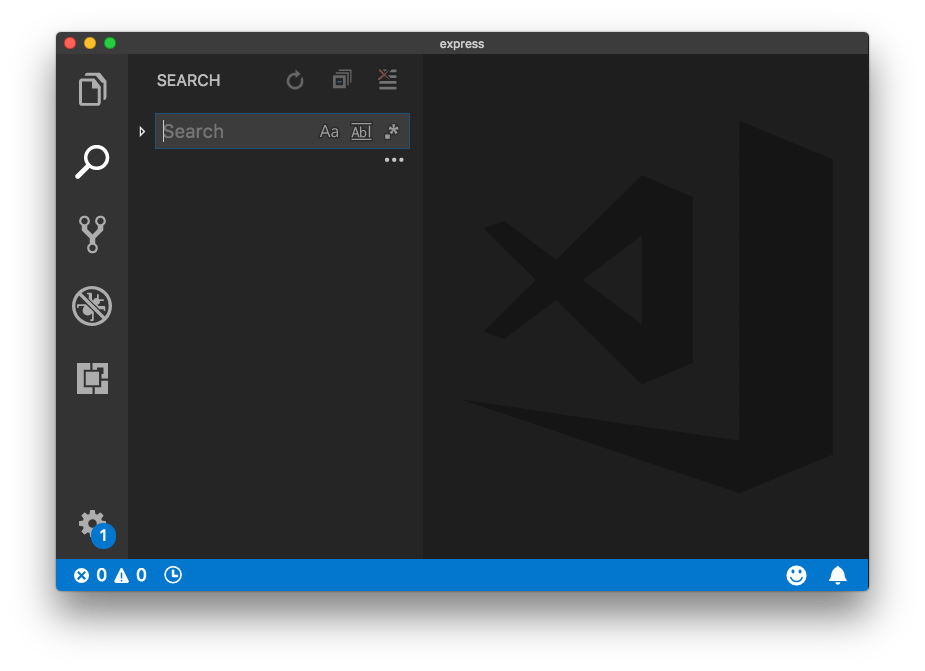
You can click the icons to make the search case-sensitive, to match whole words (not substrings), and to use a regular expression for the search string.
To perform the search, press Enter.
Clicking the ▷ symbol on the left enables the search and replace tool.
Clicking the three dots shows a panel that lets you include some specific kinds of files and exclude other files:
Source Control
The Source Control tab is enabled by clicking the third icon in the toolbar.
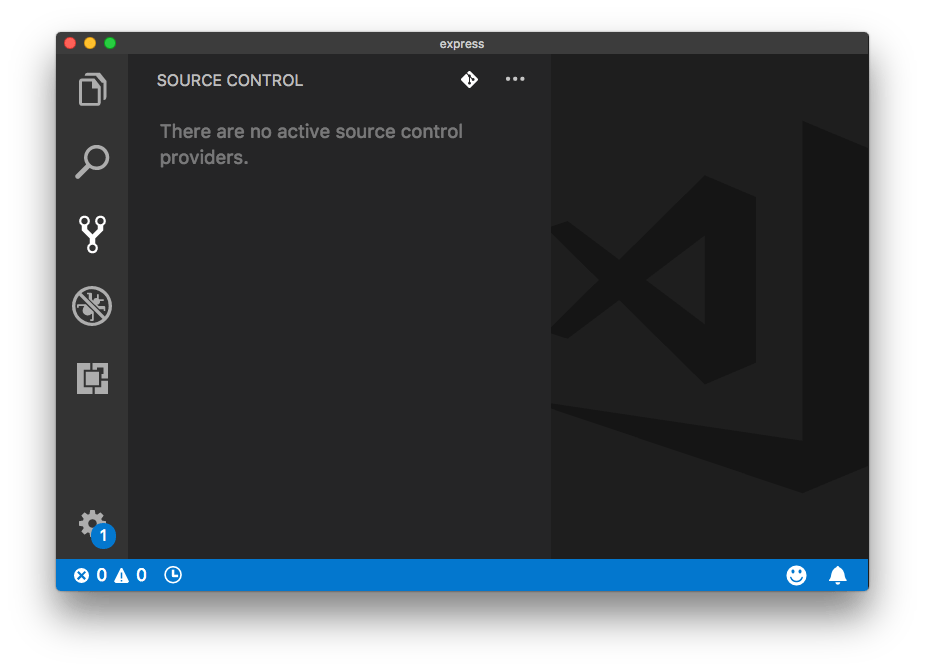
VS Code comes with Git support out of the box. In this case the folder we opened does not have source control initialized.
Clicking the first icon on top, with the Git logo, allows us to initialize the Git repository:

The U beside each file means that it’s been updated since the last commit (since we never did a commit in the first place, all files are updated).
Create the first commit by writing a text message and pressing Cmd+Enter, or clicking the ✔︎ icon on top.
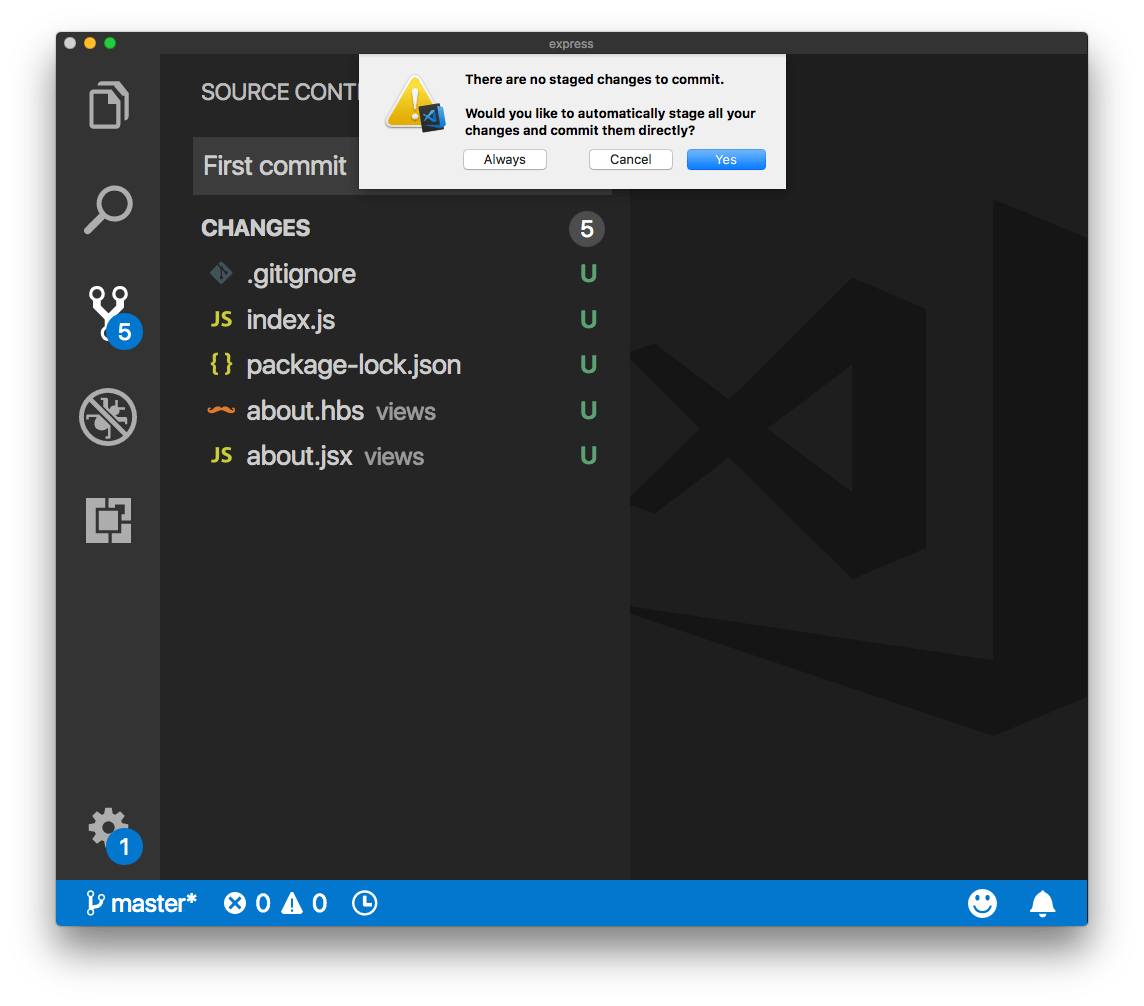
I usually set this to automatically stage the changes when I commit them.
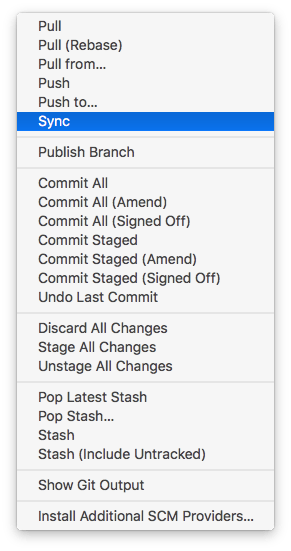
The three dots icon, when clicked, offers lots of options for interacting with Git:
Debugger
The fourth icon in the toolbar opens the JavaScript debugger. This deserves an article on its own. In the meantime check out the official docs.
Extensions
The fifth icon brings us to extensions.
Extensions are one killer feature of VS Code.
They can provide so much value that you’ll surely end up using tons of them.
I have lots of extensions installed.
One thing to remember is that every extension you install is going to impact (more or less) the performance of your editor.
You can disable an extension you install and enable it only when you need it.
You can also disable an extension for a specific workspace (we’ll talk about workspaces later). For example, you don’t want to enable the JavaScript extensions in a Go project.
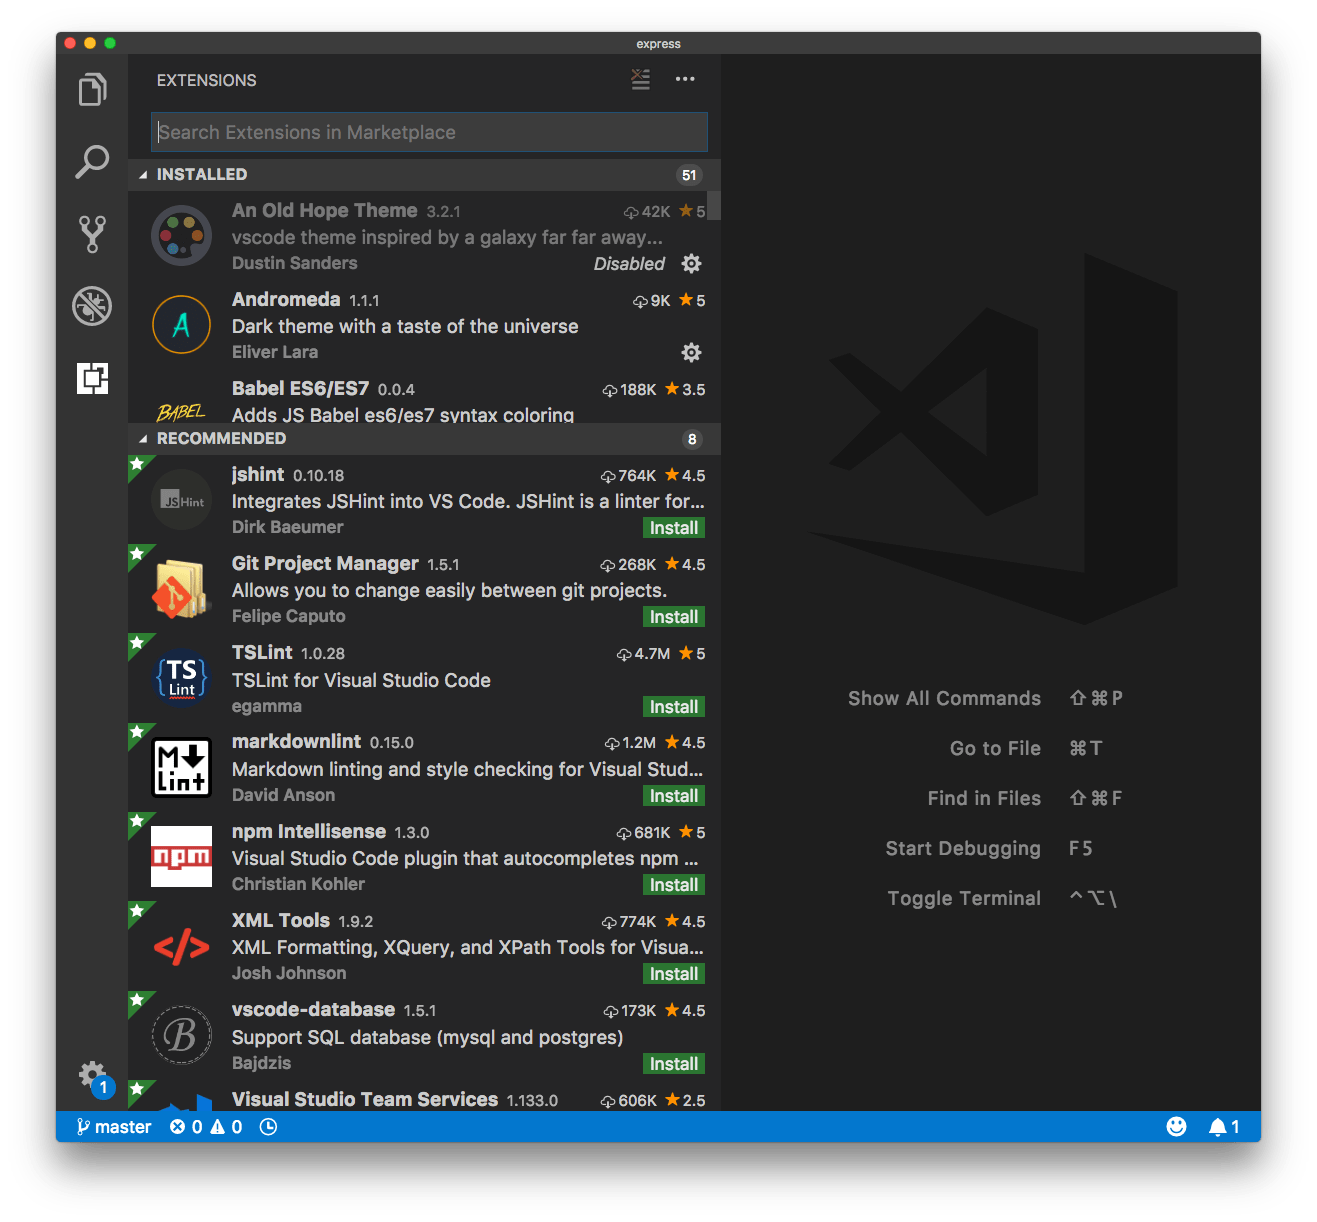
There is a list of recommended extensions, which includes all the most popular tools.

Since I edit lots of Markdown files for my blog, VS Code suggests the markdownlint extension, which provides linting and syntax checking for Markdown files.
As an example, let’s install it.
First, I inspect the number of views. It’s 1.2M, so many! And the reviews are positive (4.5/5). Clicking the extension name opens the details on the right.
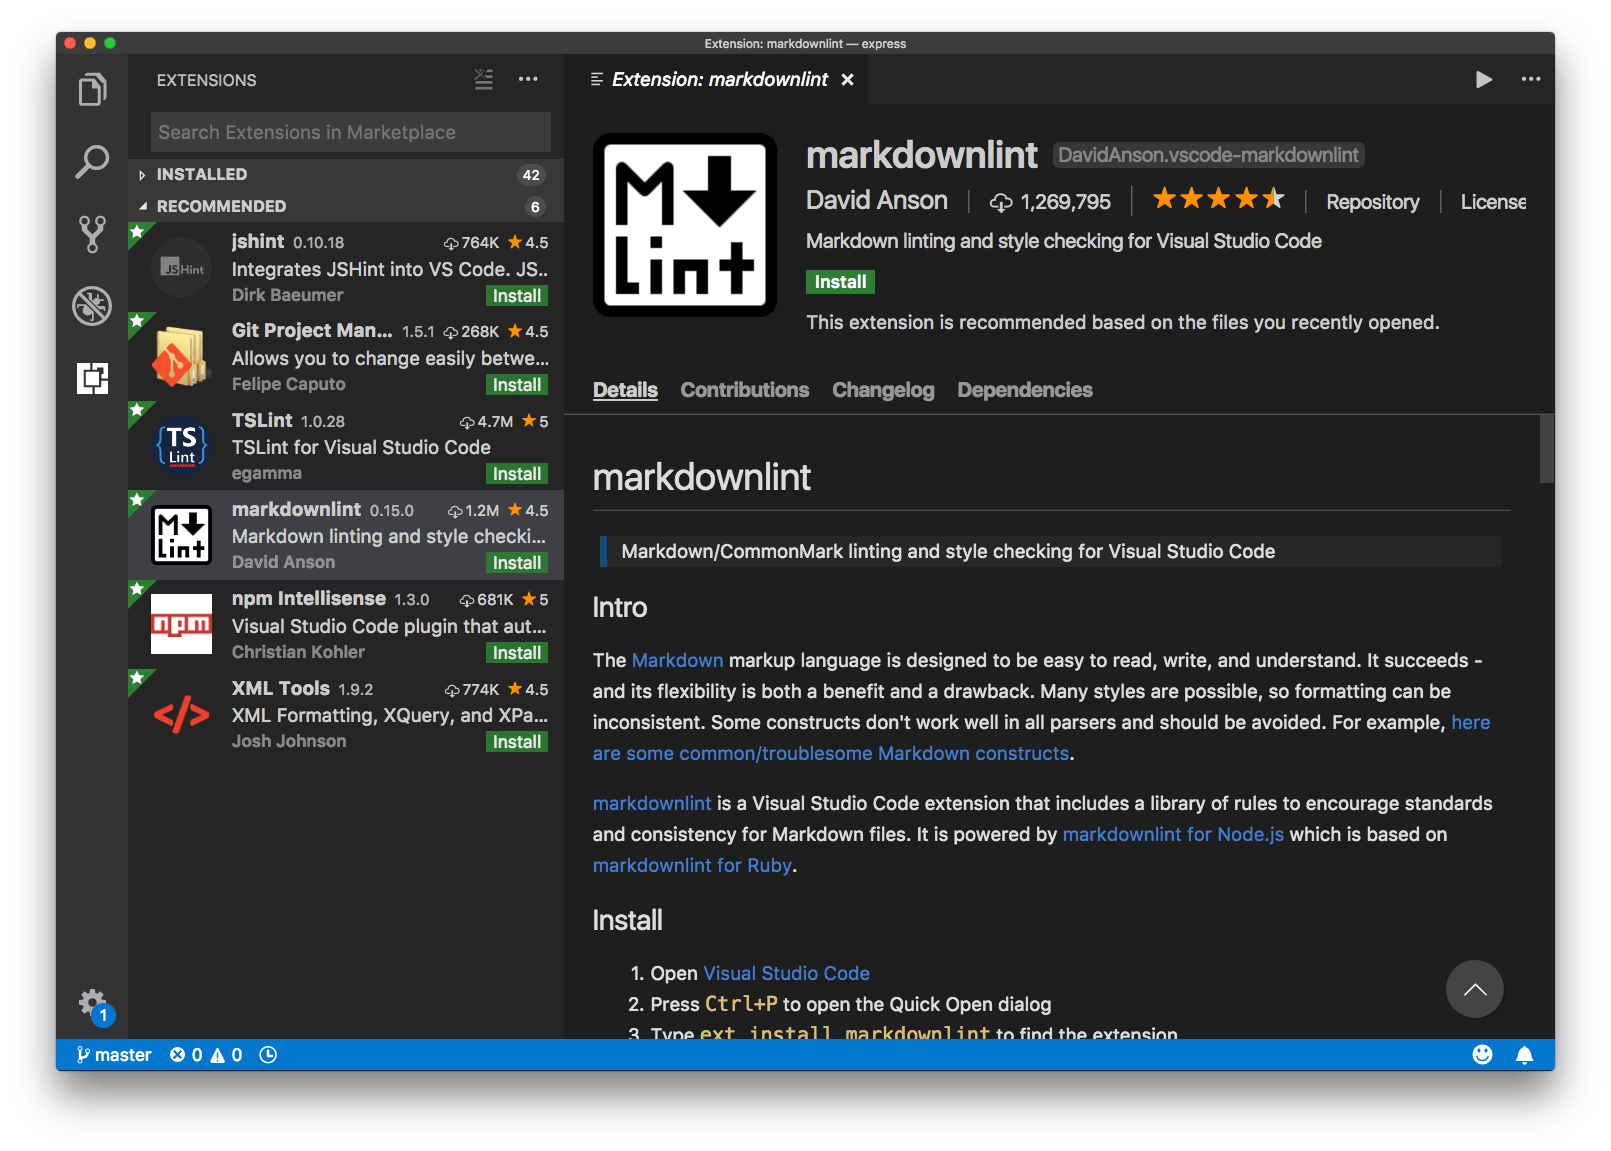
Pressing the green Install button starts the installation process, which is straightforward. It does everything for you, and you just need to click the “Reload” button to activate it, which basically reboots the editor window.
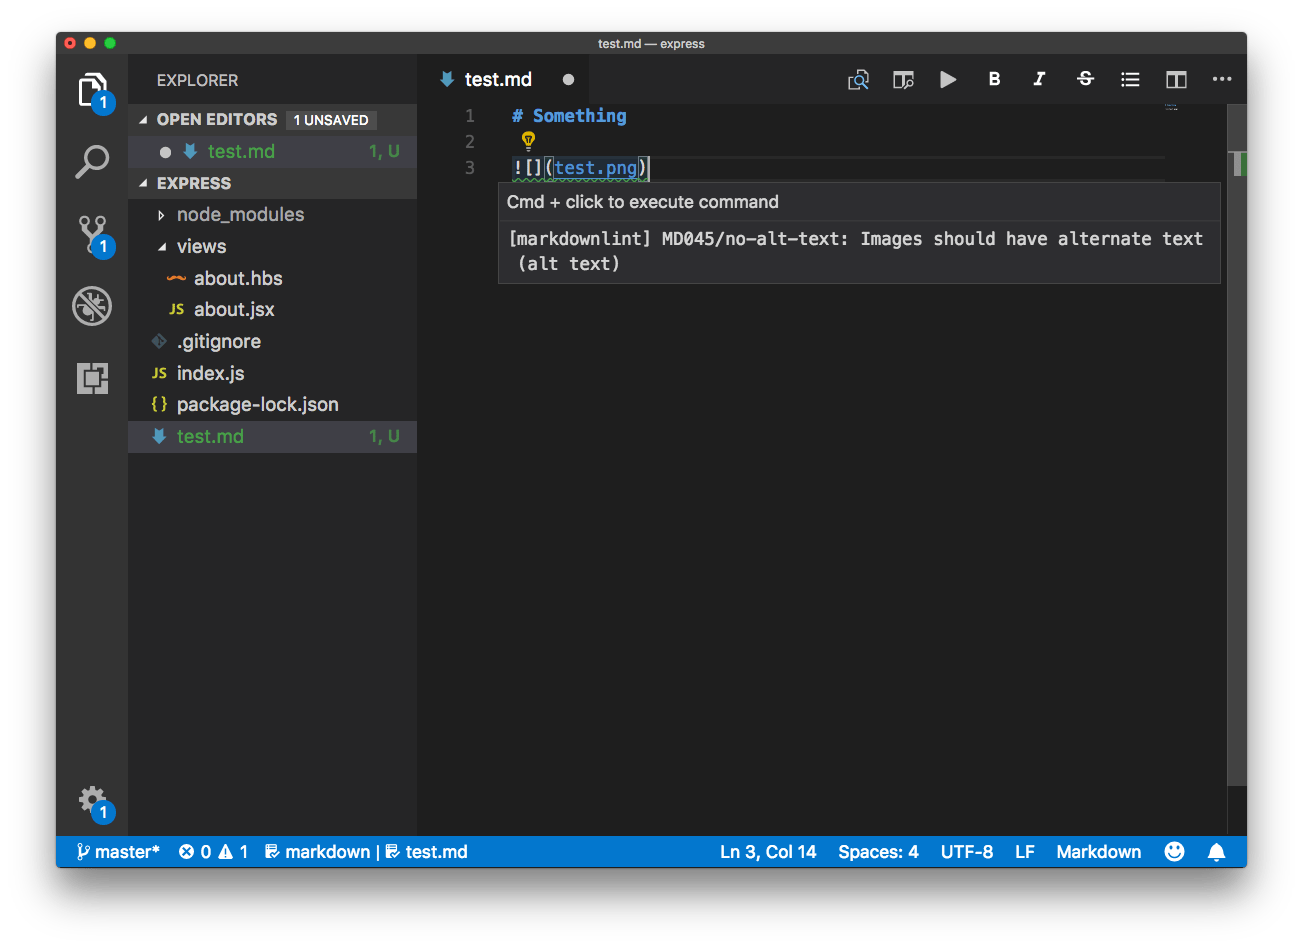
Done! Let’s test it by creating a markdown file with an error, like a missing alt attribute on an image. It successfully tells us so:
Down below I introduce some popular extensions you don’t want to miss, and the ones I use the most.
The Terminal
VS Code has an integrated terminal.
You can activate it from the menu View ➤ Integrated Terminal, or using `Cmd+“ and it will open with your default shell.
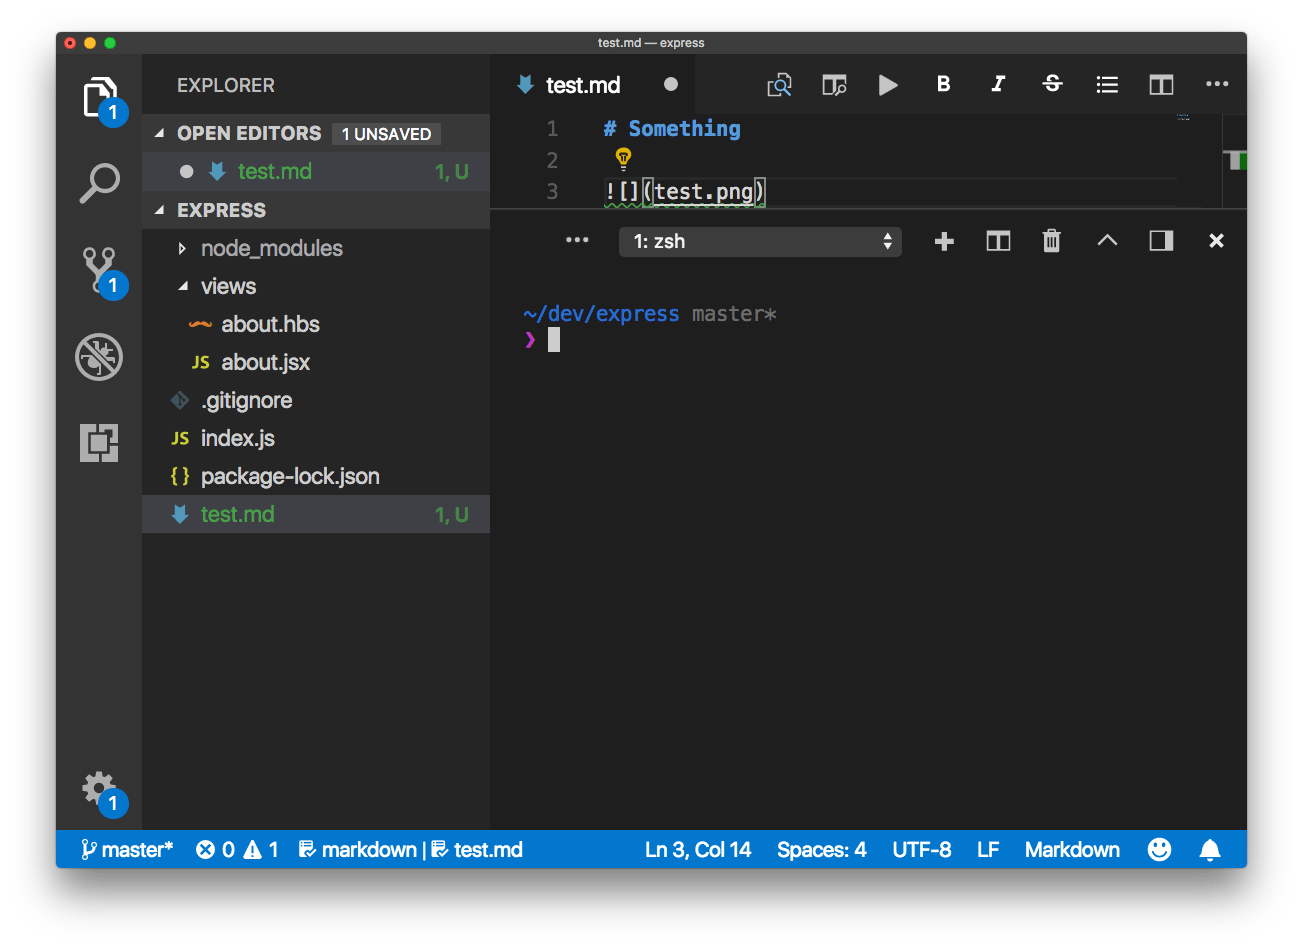
This is very convenient because in modern web development you almost always have some npm or yarn process running in the background.
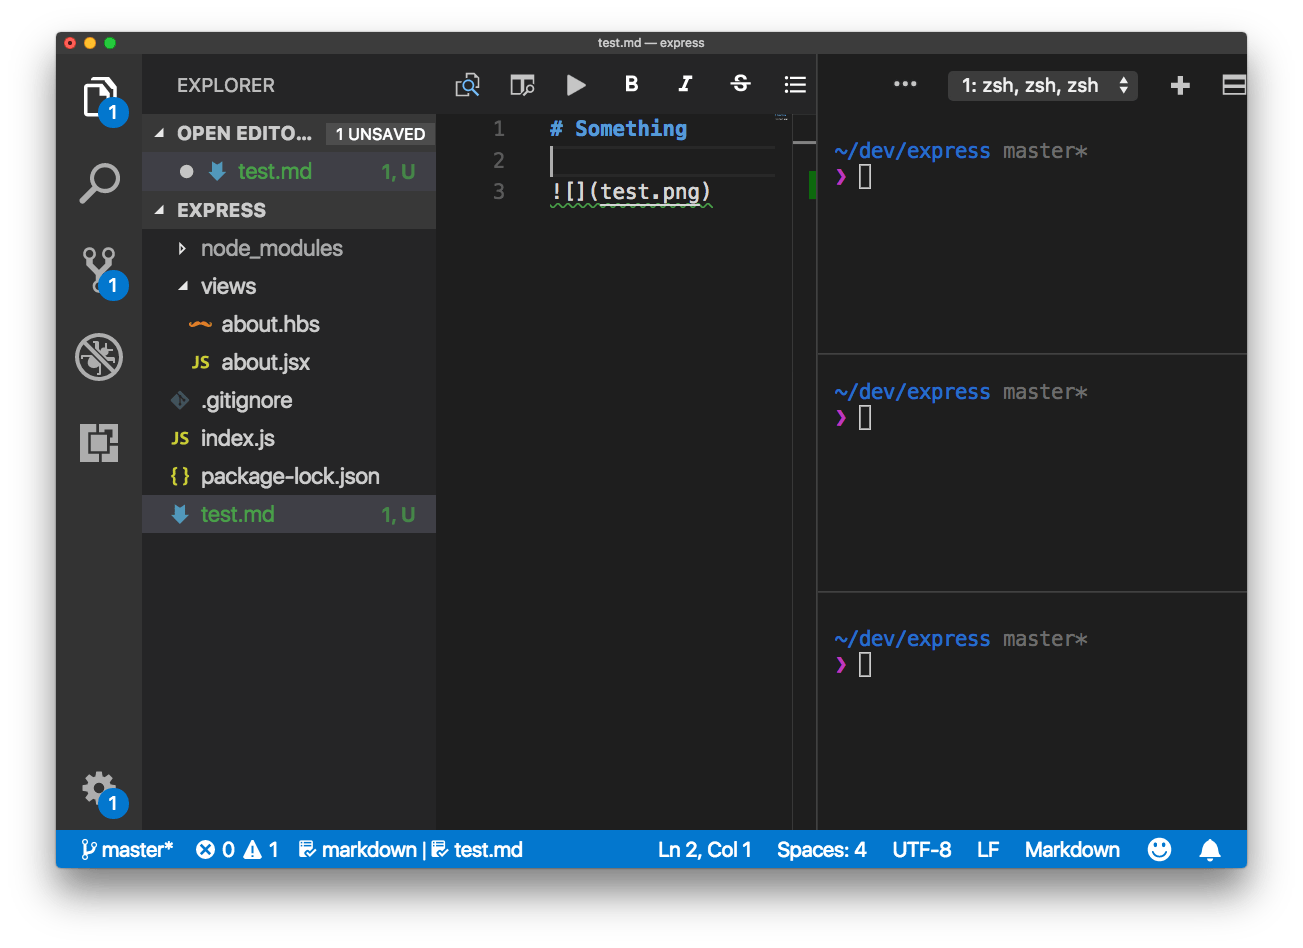
You can create more than one terminal tab, and show them one next to the other, and also stack them to the right rather than in the bottom of the window:
The Command Palette
The Command Palette is a very powerful tool. You enable it by clicking View ➤ Command Palette, or using Cmd+Shift+P.
A modal window will appear at the top, offering you various options, depending on which extensions you have installed and which commands you used last.
Common operations I perform are:
- Extensions: Install Extensions
- Preferences: Color Theme to change the color theme (I sometimes change from night to day)
- Format Document, which formats code automatically
- Run Code, which is provided by Code Runner, and executes the highlighted lines of JavaScript
You can activate any of those by starting to type, and the autocomplete functionality will show you the one you want.
Remember when you typed Cmd+P to see the list of files? That’s a shortcut to a specific feature of the Command Palette. There are others:
Ctrl+Shift+Tabshows you the active files.Ctrl+Gopens the Command Palette to let you enter a line number to go to.Cmd+Shift+Oshows the list of symbols found in the current file.
What symbols are depends on the file type. In JavaScript, those might be classes or functions. In Markdown, section headings.
Themes
You can switch the color theme used by clicking Cmd+K, then Cmd+T, or by invoking the Preferences: Color Theme command.
This will show you the list of themes installed:
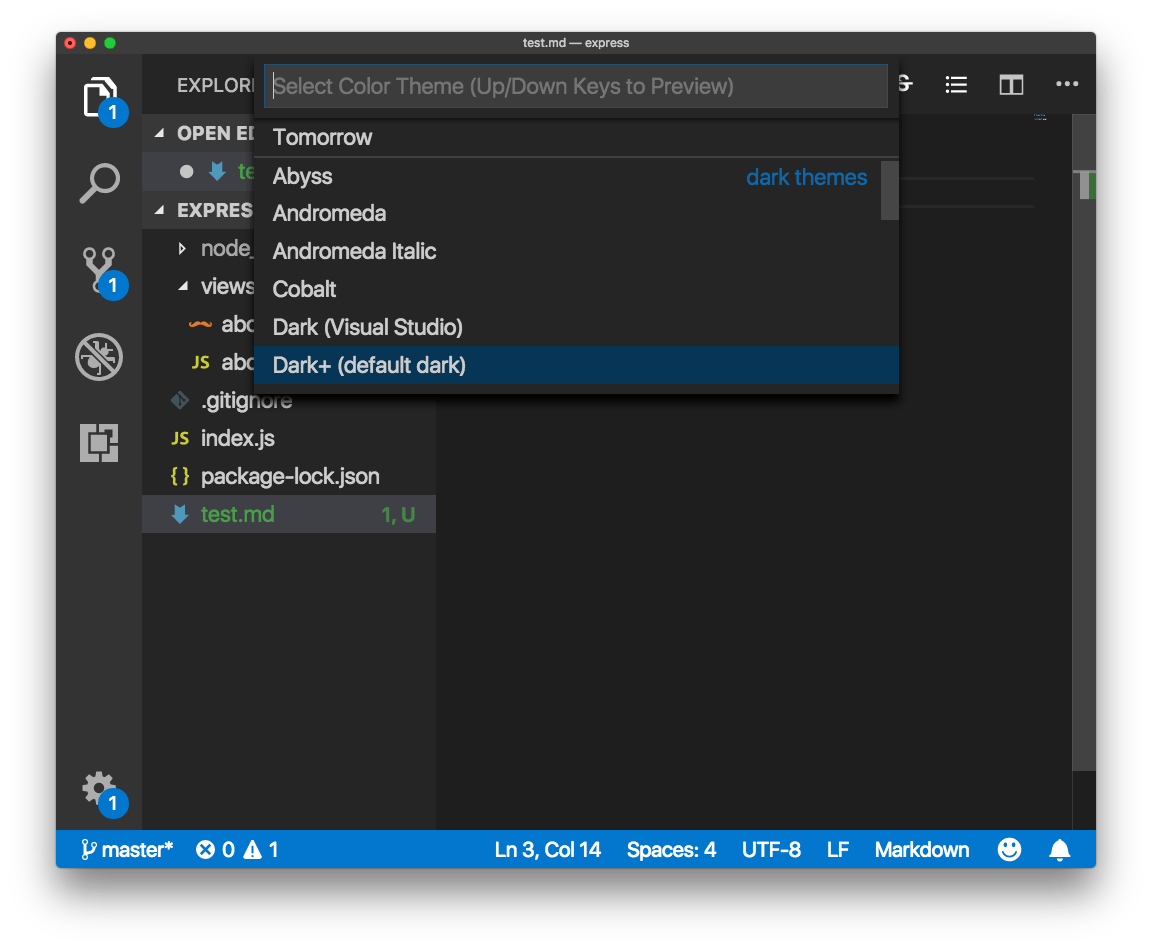
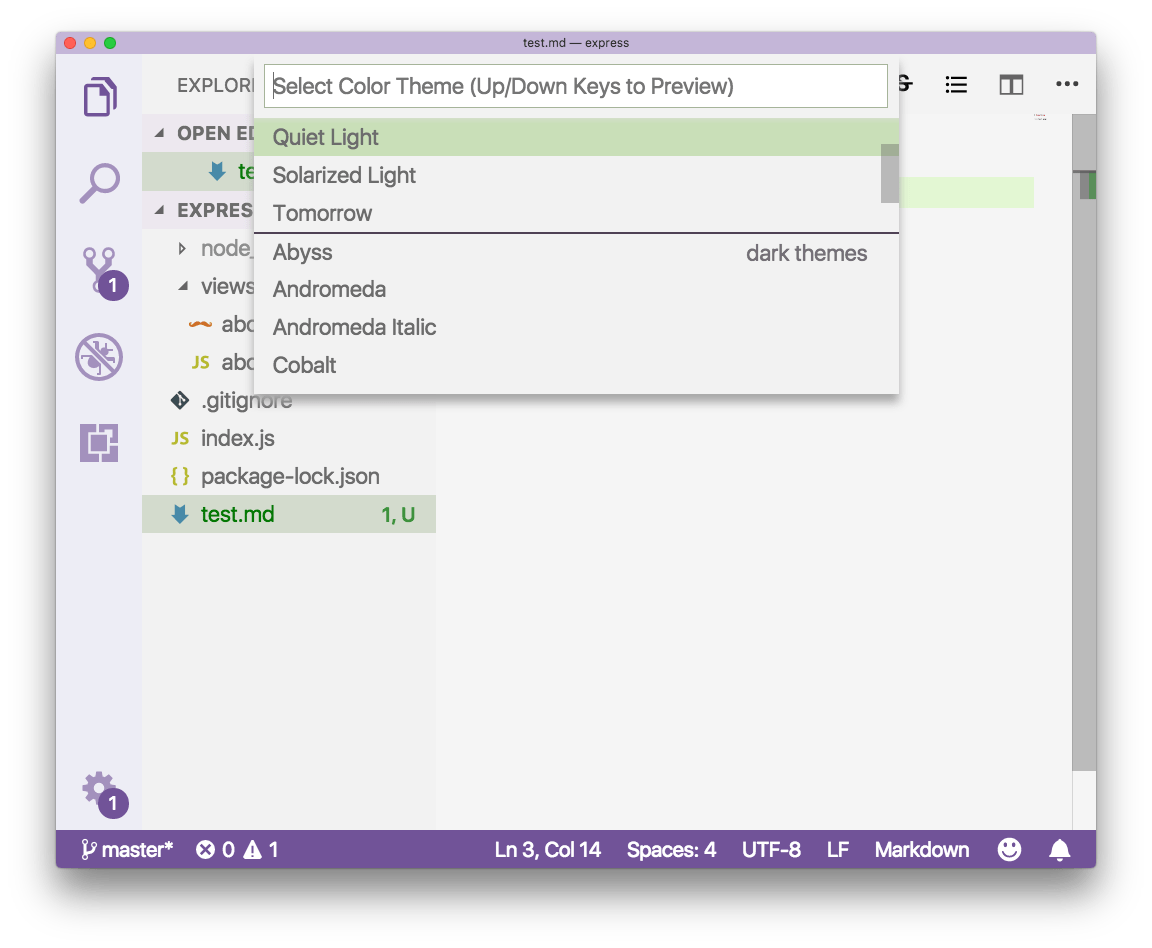
You can click one, or move with the keyboard, and VS Code will show you a preview. Press Enter to apply the theme:
Themes are just extensions. You can install new themes by going to the extensions manager.
Probably the best way for discoverability is to use the marketplace website.
My favorite theme is Ayu, which provides a great style for any time of the day: night, morning/evening, and afternoon.
Customization
Themes are just one customization you can make.
The sidebar icons that are assigned to a file are also a big part of a nice user experience.
You can change those by going to Preferences ➤ File Icon Theme. Ayu comes with its own icon theme, which perfectly matches the theme colors:
All those customizations we made so far, the theme and the icon theme, are saved to the user preferences.
Go to Preferences ➤ Settings (also reachable via Cmd+,) to see them:
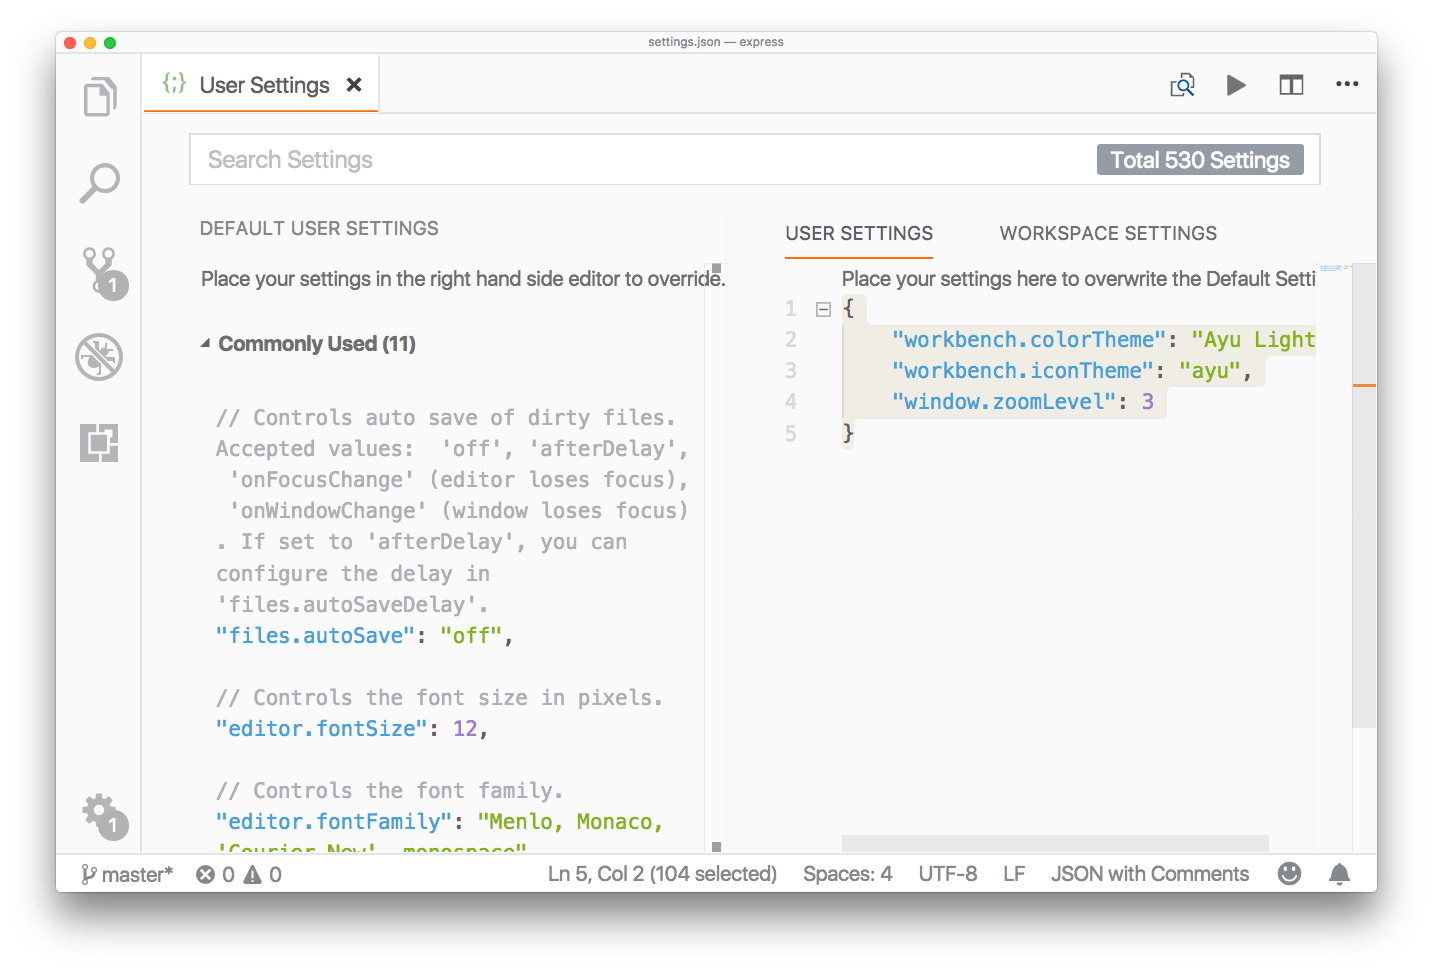
The view shows the default settings on the left, for an easy reference, and the overridden settings on the right. You can see the name of the theme and the icon theme we set up, in workbench.colorTheme and workbench.iconTheme.
I zoomed in using CMD-+, and this setting was saved as well to window.zoomLevel, so the next time VS Code starts up, it remembers my choice for zooming.
You can decide to apply some setting globally, in User Settings, or relative to a workspace, in Workspace settings.
Most of the time those settings are automatically added by extensions or by VS Code itself, but in some cases you’ll directly edit them here.
Nice configuration options
VS Code has a lot of options. Everything is highly configurable, and it’s sometimes hard to make sense of it all.
You can open the configuration JSON file using the command palette, and select Open Settings (JSON).
Some nice configuration options I set in my setup:
| Option | Description |
|---|---|
"editor.minimap.enabled": false | Remove the minimap, which is shown at the right of the editor |
"explorer.confirmDelete": false | Stop asking me for confirmation when I want to remove a file (I have source control!) |
"explorer.confirmDragAndDrop": false | Disable the confirmation for drag and drop |
"editor.formatOnSave": true | Format the code automatically when I save it |
"editor.formatOnPaste": true | Format the code automatically when I paste it in my code |
"javascript.format.enable": true | Enable formatting for JavaScript code |
"files.trimTrailingWhitespace": true | Trim whitespace in files |
"editor.multiCursorModifier": "alt" | When clicking the Alt key and clicking with the mouse, I can select multiple lines |
"editor.detectIndentation": true | Adapt to the file indentation, useful when editing other people’s code |
"editor.quickSuggestionsDelay": 0 | Show code suggestions immediately, not after a few seconds |
The best font for coding
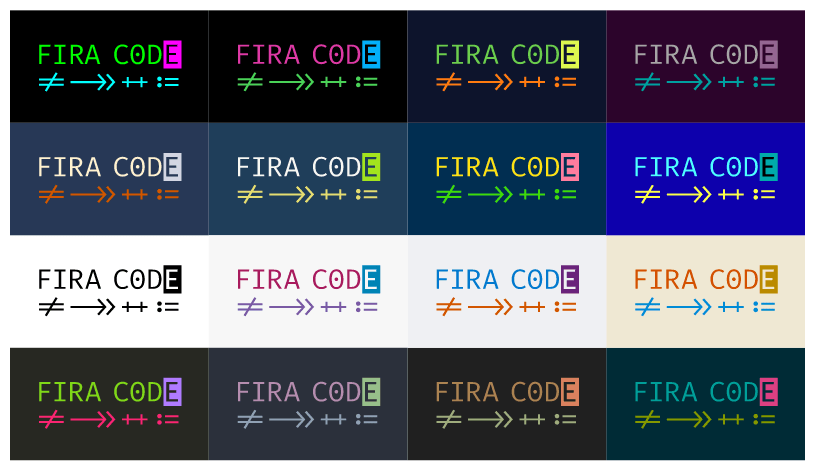
I like Fira Code. It’s free, and has some very nice programming ligatures, which transform common constructs like !== and => into nicer symbols:
Enable it by installing the font and adding this to your configuration:
"editor.fontFamily": "Fira Code",
"editor.fontLigatures": true
Workspaces
All user settings can be overridden in workspace settings. They take precedence. They are useful, for example, when you use a project that has linting rules different from all the other projects you use, and you don’t want to edit your favorite settings just for it.
You create a workspace from an existing project by clicking the File ➤ Save Workspace as... menu.
The currently opened folder will be enabled as the workspace main folder.
The next time you open VS Code, or you switch project, instead of opening a folder, you open a workspace, and that will automatically open the folder containing your code, and it will remember all the settings you set specifically for that workspace.
In addition to having workspace-level settings, you can disable extensions for a specific workspace.
You can just work with folders until you have a specific reason for wanting a workspace.
One good reason is the ability to have multiple, separate root folders. You can use the File ➤ Add Folder to Workspace to add a new root folder, which can be located anywhere in the filesystem, but will be shown along with the other existing folder you had.
Editing
IntelliSense
When you edit in one of the supported languages (JavaScript, JSON, HTML, CSS, Less, Sass, C#, and TypeScript) VS Code has IntelliSense, a technology that hints at autocompletion of functions and parameters as you type them.
Code Formatting
Two handy commands (Format Document and Format Selection) are available on the Command Palette to autoformat the code. VS Code by default supports automatic formatting for HTML, JavaScript, TypeScript, and JSON.
Errors and warnings
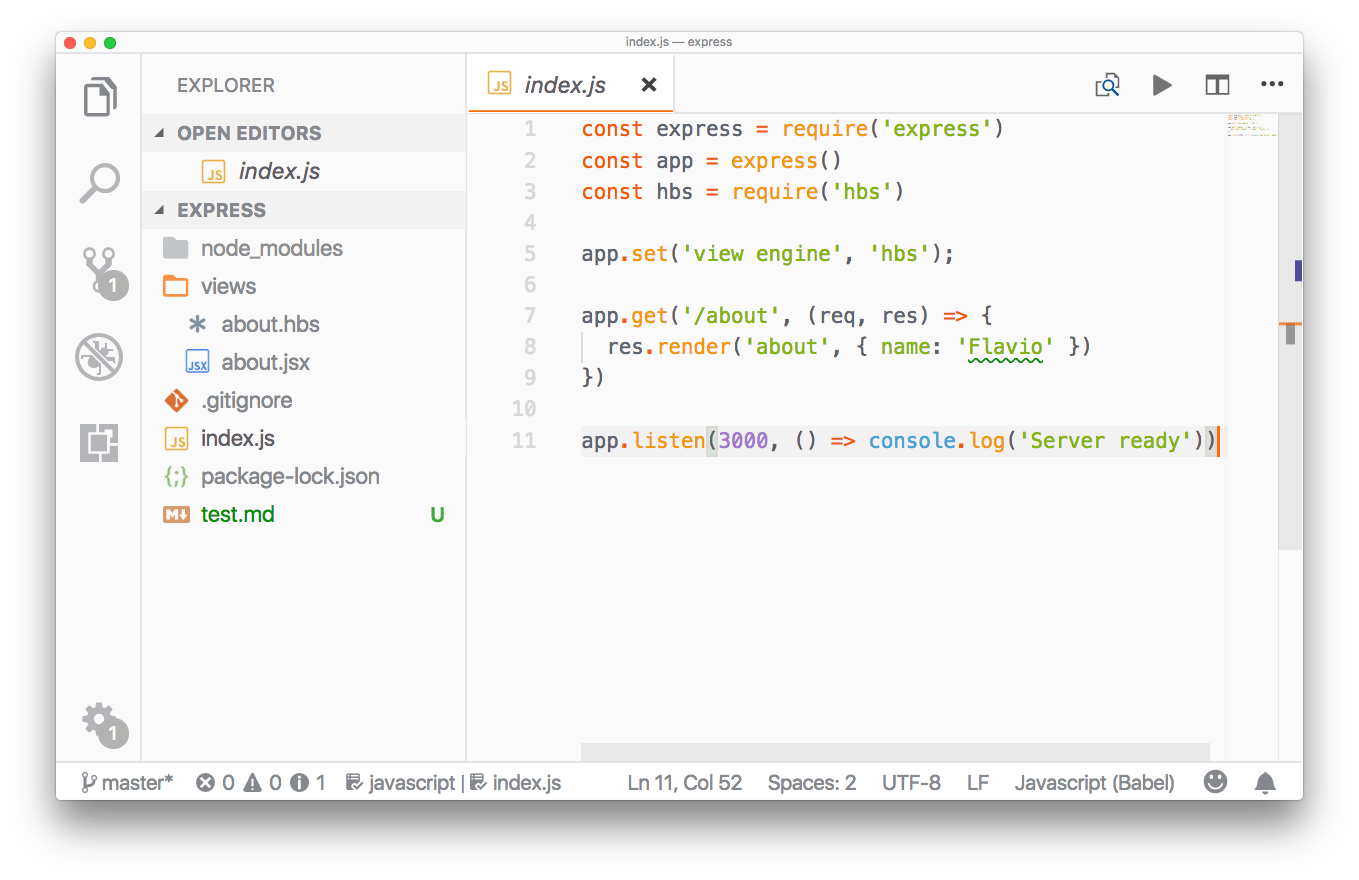
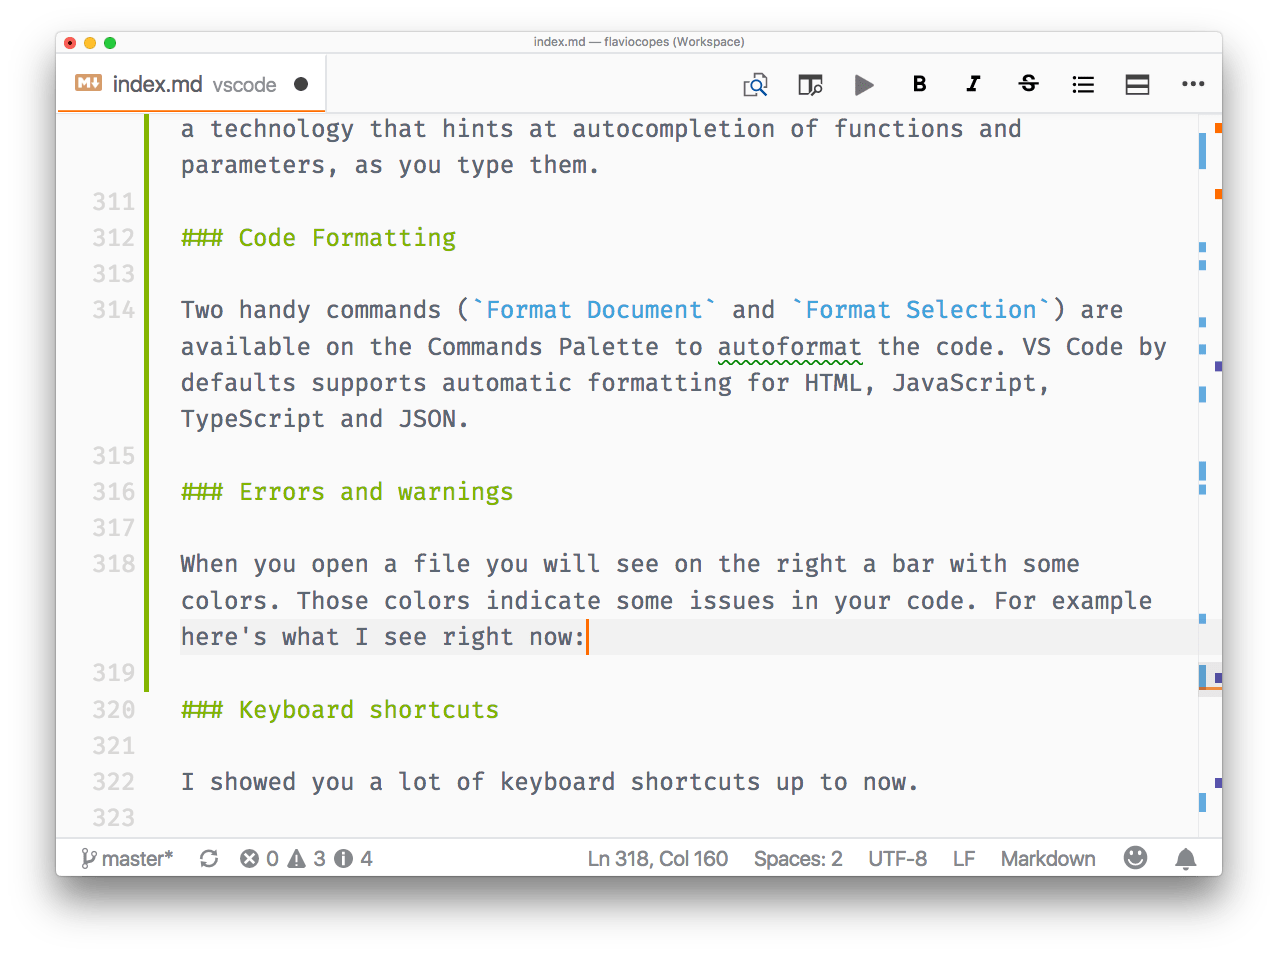
When you open a file, you will see a colored bar on the right. Those colors indicate issues in your code. For example, here’s what I see right now:
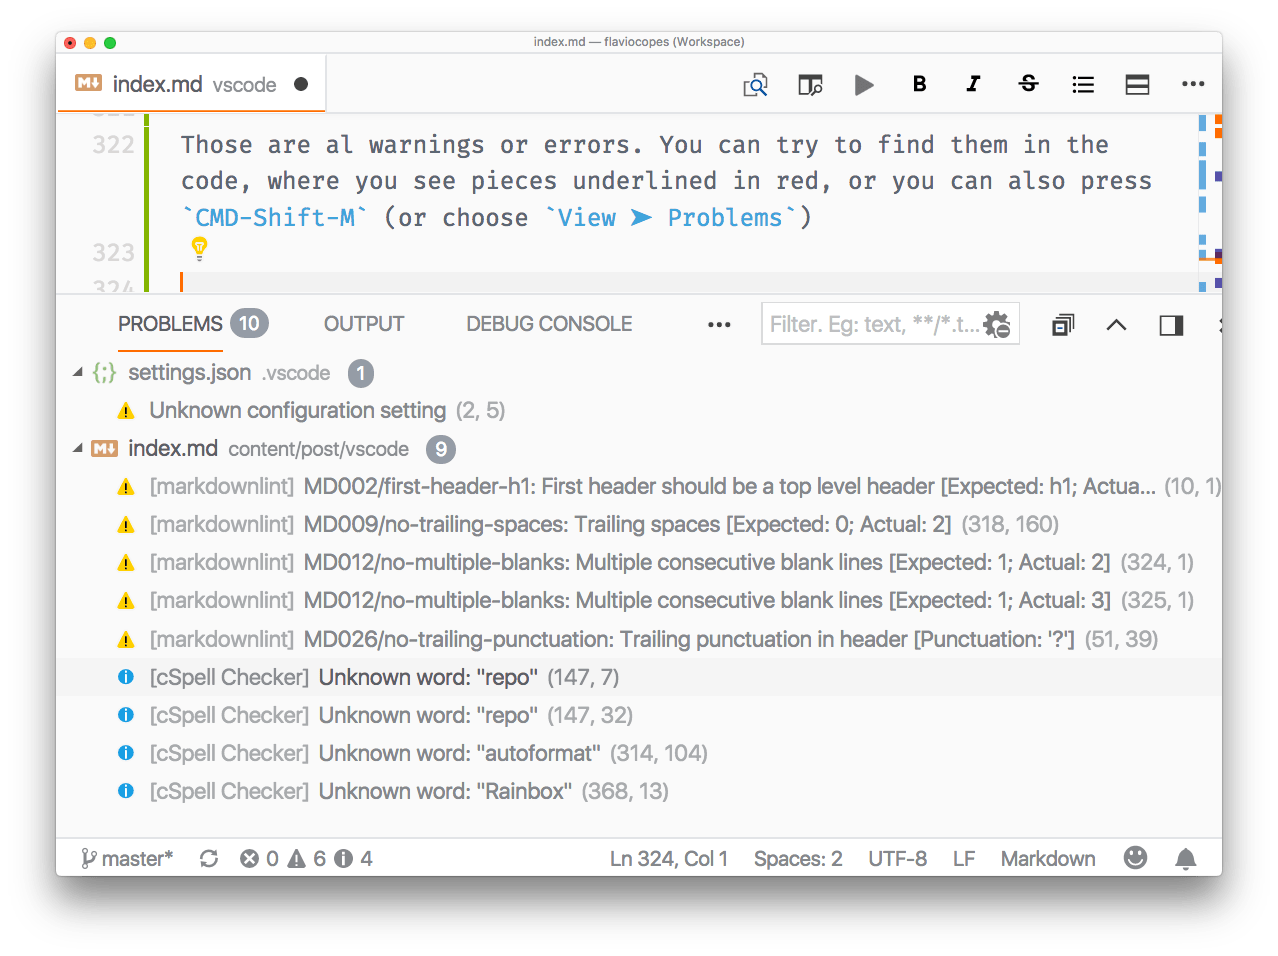
Those are all warnings or errors. You can try to find them in the code, where you see pieces underlined in red, or you can also press Cmd+Shift+M (or choose View ➤ Problems)
Keyboard shortcuts
I showed you a lot of keyboard shortcuts up to now.
It’s starting to get complicated to remember them all, but they are a nice productivity aid. I suggest printing the official shortcuts cheat sheet for Mac, Linux, and Windows.
Keymaps
If you’re used to keyboard shortcuts from other editors, maybe because you worked with one editor for a long time, you can use a keymap.
The VS Code team provides keymaps for the most popular editors out of the box: Vim, Sublime Text, Atom, IntelliJ, Eclipse, and more. They are available as extensions by opening the Preferences ➤ Keymaps Extensions menu.
Code snippets
Snippets are very cool.
For every language you might be developing in, there are extensions that provide ready-made snippets for you to use.
For JavaScript/React, one popular one is VS Code ES7 React/Redux/React-Native/JS snippets.
You just type rfe, press TAB and this appears in your editor:
import React from 'react'

const $1 = props => {
  return <div>$0</div>
}

export default $1
There are lots of these shortcuts, and they save a lot of time. Not just from typing, but also from looking up the correct syntax.
You can also define your own snippets. Click Preferences ➤ User Snippets and follow the instructions to create your own snippets file.
Extensions showcase
- GitLens: visualize who made the last change to a line of your code, and when this happened.
- Git History visualizes and searches the Git history.
- CSS Peek lets you see and edit CSS definitions by inspecting the class of an HTML element. Very handy.
- Code Runner lets you run bits of code that you select in the editor, and much more. Supports lots of languages.
- Debugger for Chrome allows you to debug JavaScript running in the browser using the VS Code debugger.
- Bracket Pair Colorizer is handy for visualizing bracket endings in your code.
- Indent-Rainbow colors the indentation levels of your code.
- Prettier check my Prettier guide.
- ESLint check my ESLint guide.
- IntelliSense for CSS improves autocompletion for CSS based on your workspace definitions.
- npm enables npm utility functions from the Command Palette.
- Auto Close Tag automatically closes HTML/JSX tags.
- Auto Rename Tag automatically renames the closing tag when you change the opening one, and vice versa.
The VS Code CLI command
Open the command palette and search for the install 'code' command in PATH command.
Press Enter and the code command will be available globally in your command line.
This is very useful to start the editor and open a new window with the content of the current folder, with code ..
code -n will create a new window.
A useful thing that’s not always known is that VS Code can quickly show the diff between two files, with code --diff file1.js file2.js.
Solving high usage CPU issues
I ran into an issue of high CPU usage, and spinning fans, with a project with lots of files under node_modules. I added this configuration and things looked normal again:
  "files.exclude": {
    "/.git": true,
    "/.DS_Store": true,
    "/node_modules": true,
    "/node_modules/": true
  },
  "search.exclude": {
    "/node_modules": true
  },
  "files.watcherExclude": {
    "/node_modules/": true
},Lessons in this unit:
| 0: | Introduction |
| 1: | The interface |
| 2: | Opening folders |
| 3: | Editing |
| 4: | Search |
| 5: | Source control |
| 6: | Extensions |
| 7: | Themes |
| 8: | Recommended extensions |
| 9: | The command palette |
| 10: | Shortcuts |
| 11: | Customization |
| 12: | Terminal |
| 13: | ▶︎ How to use VS Code |